 Ammunition Boxes
 Apparel Boxes
 Automotive Boxes
 Candle Boxes
 CBD Boxes
 Cosmetic Boxes
 Ecommerce Boxes
 Electronics Boxes
 Food Boxes
 Game and Sports Boxes
 Gift Boxes
 Jewelry Boxes
 Pharmaceutical Boxes
 PR Boxes
 Retail Boxes
 Soap Boxes
 Stationery Boxes
 Tobacco Boxes
 Straight Tuck End Boxes
 Reverse Tuck End Boxes
 Magnetic Closure Boxes
 Two Piece Boxes
 Shoulder Neck Boxes
 Rigid Drawer Boxes
 Book Style Rigid Boxes
 Collapsible Rigid Boxes
 Tuck Top Boxes
 Display Boxes
 Gable Boxes
 Mailer Boxes
 Autolock Bottom Boxes
 Telescopic Boxes
 Seal End Boxes
 Christmas Gift Bags
 Cosmetic Paper Bags
 Grocery Bags
 Kraft Paper Bags
 Merchandise Bags
 Mylar Bags
 Retail Bags
 Advent Calendar Boxes
 Bookmarks
 Bottle Neckers
 CD Jackets
 Door Hangers
 Ice Cream Cups
 Table Tents
 Tags Printing
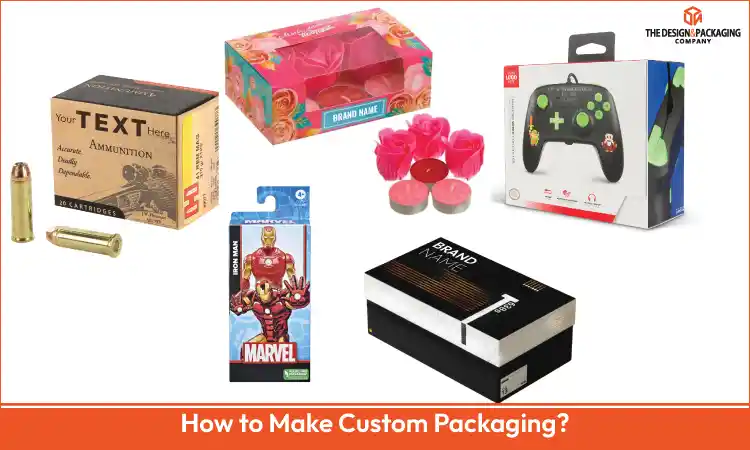
To make custom packaging, define the product requirements, choose materials and box styles, create a dieline, prepare print-ready artwork, prototype the package, and finalize production specifications before manufacturing. Achieving a market-ready result requires a structured progression through definition of needs, dieline engineering, print production, and finish application, while simultaneously balancing cost variables and production lead times. By following these established workflows, from material specification and structural testing to quality monitoring and final handoff, stakeholders can ensure packaging meets both logistical requirements and design expectations.
Use the following steps as a production checklist before requesting prototypes or quotes:
- 1. Understand Packaging Needs
- 2. Select Material
- 3. Choose Box Style
- 4. Create a Structural Dieline
- 5. Prepare Artwork
- 6. Prototype and Test
- 7. Select the Print Method and Finishes
- 8. Run a Pilot Production
- 9. Finalize Handoff Files
- 10. Monitor Quality in Production
- Printing Processes Used to Make Custom Packaging
- What Finishing Methods are Available to Create Custom Packaging
- Surface Lamination and Coatings
- Embossing, Debossing, and Foil Stamping
- Spot Finishing and Functional Features
- Cost of Custom Packaging Manufacturing
- What is the Lead Time to Design Custom Packaging?
- Mistakes to Avoid While Creating Custom Packaging
1. Understand Packaging Needs
Define packaging requirements by product dimensions, weight, fragility, and intended use. Select materials such as paperboard or film, structure such as folding carton or RSC, protection like padding or cushioning, logistics such as e-commerce or pallet shipping, regulatory and recyclability targets, and branding attributes like color accuracy and tactile finishes, then measure the product, set damage tolerance, record cost and environmental conditions, and prototype and test fit and handling.
2. Select Material
Select the substrate and record grammage, flute type, and surface finish. Paperboards include SBS at 300 gsm, for example. Corrugated boards include C-flute, for example, at 3.6 mm. Films include PET at 25 µm as an example. State recyclability preferences as a post-consumer recycled content percentage, such as 30 percent. Record substrate grammage, flute type, surface finish, barrier needs, and post-consumer recycled content percentage in the production file.
3. Choose Box Style
Choose the box style that matches packing speed, protection needs, and on-shelf presentation. Pick folding carton styles for retail display, RSC for palletized shipping, mailer boxes for direct-to-consumer e-commerce, or two-piece rigid boxes for premium presentation. Record closure type, required inner support, and typical packing time per unit for line planning.
In practice, protection requirements should usually be prioritized before visual presentation because structural failures can increase product loss and shipping costs even when packaging appearance is strong
4. Create a Structural Dieline
Create a precise vector dieline that shows cut, crease, fold, and glue panels and that uses the final substrate dimensions. Include a 3-millimeter bleed and a 3- to 5-millimeter safe text zone measured from the cut edge. Save the dieline as a layered vector file with separate layers named for cut and score, and add registration marks for the converter.
5. Prepare Artwork
Prepare a print-ready PDF in CMYK with named spot colors and embedded images at 300 dpi and separate finish layers for varnish or foil. Outline fonts and provide a color swatch reference, such as Pantone 186 C for brand red, when exact matching matters. Add a finished map that identifies lamination, spot varnish, and foil areas by layer name.
6. Prototype and Test
Produce a printed sample and a structural mockup, and run fit tests and mechanical validation. Perform a single-drop test from 0.5 to 1.2 meters and compression testing to simulate stacking loads and pallet pressure. Use the prototype to check assembly sequence, adhesive placement, and how finishes behave across score lines.
7. Select the Print Method and Finishes
Select the print method and finishing specifications according to the production requirements described in the printing-process section below, then document the chosen finishes and material specifications.
8. Run a Pilot Production
Run a pilot batch to confirm press settings, glue patterns, and assembly throughput, and to collect measurable quality data. Produce a small production sample size, such as 50 to 500 units, and inspect the first articles against the dieline and color targets. Record make-ready settings, machine speeds, and any adjustments required for full production.
9. Finalize Handoff Files
Send the converter a complete handoff package that includes the dieline, high-resolution print PDF, finish map, material specification, and assembly instructions. Specify substrate name and GSM or flute type, and provide glue pattern diagrams and fold sequence steps. Include quality tolerances and any regulatory certifications, such as food-contact status, when applicable.
10. Monitor Quality in Production
Monitor incoming inspection pass rate, measure color variation as Delta E, and track field damage percent to ensure production meets specifications. Record dimensional tolerance targets of ±1 to 2 millimeters and log nonconformance rates by defect type. Use first-article checks and periodic in-line sampling to maintain consistent output across the run.
Printing Processes Used to Make Custom Packaging
Match the printing method to run length, substrate, and color requirements. Use digital for short and variable runs. Use offset for detailed lithographic work at medium volumes. Use flexography for corrugated and flexible substrates at high volumes. Use gravure for high runs or continuous-tone film work.
Digital Printing
Digital presses execute toner or inkjet transfer directly from file to substrate and suit short runs and variable-data jobs. For example, HP Indigo and high-speed inkjet presses. Digital printing requires minimal setup and produces fast turnarounds. Unit cost decreases as run length increases, but remains higher than conventional processes beyond several thousand units.
Offset Lithography
Offset lithography transfers ink from plates to a blanket and then to the substrate to achieve consistent color reproduction. Printers use offset when run lengths reach medium to high volumes because plate setup costs are amortized over the run. Offset attains fine detail and solid ink densities. It supports spot colors such as Pantone and high-resolution screening.
Flexography and Gravure
Flexography uses flexible plates and serves corrugated and flexible packaging. Printers select flexo for long, continuous runs because the cylinder setup is rapid. Gravure uses engraved cylinders and suits long runs and high ink volumes on films. Choose flexo for corrugated boards and printed film laminates when run lengths exceed several thousand linear meters.
What Finishing Methods are Available to Create Custom Packaging
Choose finishing based on the visual goal and the functional requirement. Use lamination and coatings for scuff resistance and tactile contrast, use foil and embossing for premium aesthetics, and use cold-foil or holographic treatments for security and differentiation.
Surface Lamination and Coatings
Lamination films such as BOPP and PET, and aqueous coatings that are water-based, act as surface treatments that improve abrasion resistance and change gloss. Classify these treatments by recyclability and by thickness. Such as BOPP 12–36 µm and aqueous varnish. Soft-touch lamination produces a matte tactile surface and reduces recyclability compared with aqueous coatings unless compostable films are specified.
Embossing, Debossing, and Foil Stamping
Embossing and debossing create relief to add tactile emphasis, and they vary by depth and die complexity. Typical blind emboss depths range from 0.5 to 2.0 mm, depending on board caliper. Hot foil stamping transfers metallic leaf with heat and pressure and produces reflective highlights and micro-security elements. For instance, a gold foil logo and a cold-foil hologram.
Spot Finishing and Functional Features
Spot UV varnish and soft-touch spot coatings are applied selectively to highlight artwork or to add friction for grip. Functional features such as tear strips, perforations, and tamper-evident seals act as mechanical finishing operations that improve user interaction and strengthen supply chain integrity. Examples are a tear strip and a tamper-evident seal.
Cost of Custom Packaging Manufacturing
Custom packaging costs vary by order volume, raw materials, printing methods, and finishing requirements. The figures below provide automotive and planning estimates that must be verified during individual supplier quoting. Manufacturing costs typically span $0.15 to $25 per unit, depending on run length and substrate complexity. Total expense stems from setup fees for die-cutting and plate production ranging from $50 to $700, which are amortized across the run. Substrate selection drives the baseline price; folding carton paperboard starts at $0.15 per unit, whereas premium rigid boxes reach $25 per unit. Digital printing optimizes short runs, while high-volume offset or flexographic methods reduce per-unit costs during automated machine conversion.
What is the Lead Time to Design Custom Packaging?
Design-to-production lead times fluctuate based on prototyping needs, tooling preparation, finishing complexity, and approval cycles. The timelines below serve as illustrative planning estimates subject to supplier capacity and regional constraints. The total design and conversion sequence commonly spans 1 to 30 calendar days. This cycle begins with a 1- to 7-day phase for creating structural prototypes and physical samples to validate product fit. Following layout approval, digital production takes 3 to 14 days, whereas plate-based conventional runs require 10 to 30 days for tooling setup. Specialized surface treatments or brand compliance steps can add an extra 7 to 14 days to the final schedule.
Mistakes to Avoid While Creating Custom Packaging
Skipping technical checks before ordering custom packaging often leads to factory delays and extra costs. Avoid these common production mistakes to keep your project on schedule:
- Skipping physical prototype tests: Relying on flat measurements instead of physical fit tests leads to incorrect dielines. This creates space that causes boxes to collapse under stacking pressure.
- Omitting artwork bleed zones: Designing without a 3 mm bleed causes misalignment during cutting, which can slice off text or leave raw edges.
- Combining finish layers with artwork: Mixing CMYK graphics with spot UV or foil elements on a single layer delays press setup. Premium treatments require separate vector layers.
- Ignoring carrier handling rules: Oversized boxes trigger expensive dimensional weight penalties, while weak board grades tear on automated conveyor belts.
Fixing these errors before the final file handoff ensures a smooth manufacturing run. Verifying your dielines, artwork layers, and board thickness saves you from paying for costly factory remakes.