 Ammunition Boxes
 Apparel Boxes
 Automotive Boxes
 Candle Boxes
 CBD Boxes
 Cosmetic Boxes
 Ecommerce Boxes
 Electronics Boxes
 Food Boxes
 Game and Sports Boxes
 Gift Boxes
 Jewelry Boxes
 Pharmaceutical Boxes
 PR Boxes
 Retail Boxes
 Soap Boxes
 Stationery Boxes
 Tobacco Boxes
 Straight Tuck End Boxes
 Reverse Tuck End Boxes
 Magnetic Closure Boxes
 Two Piece Boxes
 Shoulder Neck Boxes
 Rigid Drawer Boxes
 Book Style Rigid Boxes
 Collapsible Rigid Boxes
 Tuck Top Boxes
 Display Boxes
 Gable Boxes
 Mailer Boxes
 Autolock Bottom Boxes
 Telescopic Boxes
 Seal End Boxes
 Christmas Gift Bags
 Cosmetic Paper Bags
 Grocery Bags
 Kraft Paper Bags
 Merchandise Bags
 Mylar Bags
 Retail Bags
 Advent Calendar Boxes
 Bookmarks
 Bottle Neckers
 CD Jackets
 Door Hangers
 Ice Cream Cups
 Table Tents
 Tags Printing
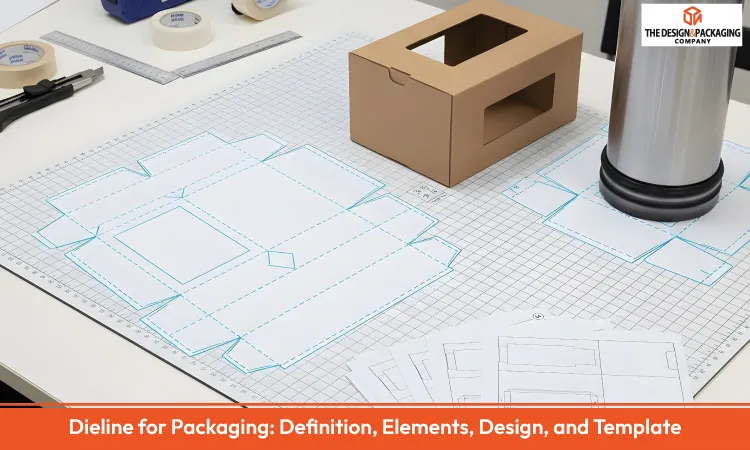
A dieline is the flat technical drawing that tells a printer where a package will be cut, folded, glued, and trimmed. In packaging, it connects the visual design with the physical form so panels, closures, labels, and brand elements work together. Its elements explain the marks, layers, and spacing that guide manufacturing. The design process shapes the package around product fit, supplier requirements, and print accuracy. Templates provide a practical starting point for common cartons, mailers, sleeves, inserts, and other package styles. It keeps the artwork aligned with the structure so logos, barcodes, panels, and folds land in the right place. A good dieline also gives suppliers a shared file for estimating, prototyping, die making, and press setup.
- What is a Dieline?
- Importance of Dielines in Packaging Design
- Core Elements That Make Up a Dieline
- Cut Lines
- Fold and Score Lines
- Bleed Areas
- Safe Zones
- Glue and Overlap Indicators
- Perforation Lines and Registration Marks
- Designing, Creation, and Storage of Dielines
- 1. Shaping Structural Design
- 2. Constructing the Vector Layout
- 3. Organizing Layers
- 4. Preparing the File
- 5. Maintaining Version Control
- Software and File Formats Recommended for Dieline Creation
- Common Dieline Templates and Their Suppliers
- Folding Cartons and Product Boxes
- Media and Stationery Packaging
- Supplier-Provided and Custom Templates
- How Do You Get the Right Dieline Template?
- What are the Advantages and Disadvantages of Using Dielines?
- Dieline Mistakes Causing the Highest Production Costs
- Major Applications of Dielines Across Various Industries
- How to Read a Dieline Quickly?
- Current Digital Workflow Considerations for Dieline Design
- Print-Ready Dieline Standards
What is a Dieline?
A dieline is a two-dimensional production guide that shows where a package will be cut, folded, scored, perforated, glued, and printed. On a folding carton, it separates the front panel from the side panels, tuck flaps, dust flaps, glue flap, barcode area, and bleed. Mockups and 3D renderings help confirm that the flat layout will fold into the intended package before production starts.
Importance of Dielines in Packaging Design
Dielines matter because small layout mistakes become physical problems once the package is printed, cut, folded, and glued. A barcode placed too close to a crease, a logo crossing a tuck flap, or a panel measured without product clearance can cause reprints, poor shelf presentation, or assembly issues.
- Structural fit: A dieline shows where panels, flaps, folds, and tuck closures sit, so the finished box fits the product instead of squeezing it or leaving too much space.
- Artwork placement: It helps keep logos, barcodes, product claims, and legal text away from folds, glue seams, trim edges, and hidden panels.
- Material planning: A clean dieline can reduce wasted board by arranging panels, flaps, and bleed areas efficiently before the job reaches print or die cutting.
Core Elements That Make Up a Dieline
A working dieline is easier to read when each production instruction has its own line style or layer. Cut paths show the outside shape, score lines mark the bends, bleed extends printed artwork past the trim, and safe zones keep important content away from risky edges.
Cut Lines
Cut lines show the final outside edge of the package after trimming. A small carton may only need a simple rectangular outline with tuck flaps, while a display box or insert may include windows, slots, rounded corners, or locking tabs. These paths should stay clean and consistent because the die maker uses them to create the cutting rule.
Fold and Score Lines
Fold and score lines identify the bend locations that create panels, closures, and connection flaps. Score lines are pressed into the material so the board folds cleanly without being cut through. In die cutting, crease rule specifications describe the tooling or metal rules used to create those fold channels, and the supplier should confirm them based on the board thickness and package structure. Keeping fold, score, and cut lines visually distinct helps prevent confusion during die fabrication and press setup.
Bleed Areas
Bleed areas extend artwork beyond the trim line so minor press movement or die-cut variation doesn’t leave exposed substrate at the edge of the package. Many suppliers request bleed around 0.125 to 0.25 inches, but the required amount depends on the substrate, print method, cutting process, and package structure. Packaging panels with edge-to-edge graphics, such as wrap panels on folding cartons, need enough bleed to reduce the risk of white gaps after trimming. The final bleed should always match the printer’s dieline and production tolerance.
Safe Zones
Safe zones keep printed elements, including barcodes, compliance labels, and brand marks, away from cut and fold paths. A 0.125-inch setback is a common starting point, but the final safe zone should follow the supplier’s dieline, folding tolerance, board thickness, and label requirements. Panels that compress during folding may need additional clearance to prevent distortion on retail-facing surfaces. Supplier-confirmed margins make layout revisions safer before tooling, proofing, or mass production.
Glue and Overlap Indicators
Glue and overlap indicators show where one panel attaches to another. On a straight tuck carton, this is often a narrow side seam; on a mailer, it may involve locking tabs or reinforced overlaps instead of adhesive. Clear glue limits help the supplier avoid squeeze-out, weak seams, and assembly problems on hand-glued or machine-glued runs.
Perforation Lines and Registration Marks
Perforation lines define tear paths for features such as ventilation openings, peel strips, or tamper sections. Registration marks are small alignment marks used by printers and die cutters to match the printed artwork with the cutting, folding, or scoring position. Keeping perforation lines and registration marks on separate non-printing layers prevents unwanted marks from appearing on the finished packaging.
Designing, Creation, and Storage of Dielines
A dieline usually starts as a structural idea, then becomes a measured working file that the designer, supplier, printer, and die maker can all read. The process is less about drawing a box shape from scratch and more about checking product clearance, fold behavior, glue areas, artwork position, and supplier requirements before the file is approved.
The following steps outline the complete process of designing, creating, and storing dielines:
1. Shaping Structural Design
Draft the dieline as a flat plan showing panel dimensions, fold lines, glue areas, and product clearance, starting with proportional sketches that reflect the product’s footprint.
2. Constructing the Vector Layout
Convert the structural plan into vector format using CAD or Illustrator, assigning distinct line types and colors for cuts, creases, perforations, and glue areas on separate layers for precise fabrication guidance.
3. Organizing Layers
Organize layers to separate artwork, mechanical lines, annotations, glue areas, and non-printing instructions. Apply safe zones and bleed margins based on the supplier’s dieline rather than treating one measurement as universal. As a common starting point, many projects use about 0.125 inches for safety and 0.125 to 0.25 inches for bleed, but the final values should be confirmed with the printer before proofing or tooling.
4. Preparing the File
Store the dieline as an editable AI file for design revisions and export the print file in the format requested by the printer. PDF/X is a print-focused PDF standard that helps preserve fonts, colors, image settings, and output requirements more reliably than a general PDF. Some suppliers may request PDF/X, while others may prefer a layered PDF, EPS, CAD file, DXF file, or packaged Illustrator artwork.
Keep mechanical paths, such as cut, fold, score, perforation, and glue lines, as clean vector paths on separate non-printing layers. These paths shouldn’t shift, rasterize, or merge into the visible artwork because the printer or die maker uses them as production instructions.
5. Maintaining Version Control
Maintain dielines in a structured system with version numbers, revision dates, and notes to track updates, client approvals, and equipment-specific requirements.
Software and File Formats Recommended for Dieline Creation
The right software depends on the job stage. A designer may use Illustrator to place artwork on a supplier template, while a packaging engineer may use CAD software to build the structure, test folds, or prepare a cutting file. For production, the safest format is the one requested by the supplier because their prepress team and cutting equipment need to open the file without rebuilding it.
- Adobe Illustrator: A common vector tool for creating and editing dieline artwork; many suppliers accept editable AI files or exported print PDFs when they match the printer’s specifications.
- ArtiosCAD: Specialized software for structural and 3D design.
- Esko Studio: 3D visualization tool used to simulate folding, proportions, and artwork placement before prototyping.
- Dieline Generators: Online tools for quick customization of standard dieline templates.
- CorelDRAW: Vector design software suitable for creating and editing dielines in some supplier workflows.
File formats commonly requested for dieline production include:
- AI: An editable Illustrator file used for artwork revisions, dieline layers, and supplier review.
- PDF/X: A print-focused PDF format used when the printer requests a controlled press-ready file.
- EPS: A vector format some suppliers still accept for dielines and print artwork.
- DXF or CAD files: Structural file formats used by some engineers, die makers, and cutting systems.
- Packaged artwork files: Folders that include the artwork file, linked images, fonts, and supporting assets needed for production.
Technical setup guidelines include keeping cut, fold, score, perforation, and glue lines as separate vector layers, using the printer’s required color mode or spot-color setup, and setting raster images to the resolution requested for the final print size. A 300 dpi image at final size and CMYK color mode are common starting point in many workflows. Still, the supplier should confirm the required resolution, color profile, export format, and layer setup before production.
What are Standard Design Tolerances for Dielines?
Common dieline tolerances often include keeping artwork away from cut and fold lines, extending background graphics beyond the trim for bleed, and allowing for small movement during cutting, creasing, printing, and assembly. Machine-specific allowances are the small adjustments a supplier makes for its own equipment and production setup. Examples include cutter registration tolerance, press registration variation between colors, scoring pressure differences on thicker board, gluer alignment limits on narrow flaps, and slight substrate expansion or contraction caused by humidity. Many suppliers begin with general guidelines, such as a 0.125-inch safe zone and a bleed range of 0.125 to 0.25 inches, but those measurements should be verified with the printer before tooling, proofing, or final file approval.
Common Dieline Templates and Their Suppliers
A dieline template gives the project a tested starting structure instead of a blank page. For standard cartons, mailers, sleeves, folders, and inserts, suppliers often already have templates that match their dies, board options, and machine setup. Custom templates are useful when the package shape, opening style, or product fit cannot be handled by a standard layout.
Folding Cartons and Product Boxes
For folding cartons and product boxes, the template usually starts with the carton style, such as straight tuck, reverse tuck, mailer, sleeve, tray, soap box, pizza box, or gift box. From there, the dieline is adjusted around the product size, panel width, dust flaps, locking tabs, tuck closures, glue seams, and display-facing panels so the box folds cleanly and presents the artwork correctly.
Media and Stationery Packaging
For media and stationery, the dieline is usually built around how the item will be opened, stored, or presented. CD sleeves, DVD cases, pocket folders, document sleeves, and presentation folders need accurate pocket depth, tab placement, spine folds, and panel registration so inserts sit securely and folded edges stay clean.
Supplier-Provided and Custom Templates
Packaging suppliers often provide ready-to-use templates tailored to their equipment, press capabilities, and substrate options, ensuring proper fit with standard dies. Custom dielines are created for unique geometry or branding requirements but may require additional tooling and setup, increasing production cost.
Before production: If a packaging supplier already has a standard die for a carton, mailer, sleeve, or insert, start with that supplier’s dieline instead of redrawing it from scratch. Independent dielines are useful for early concept work, sizing exploration, or custom structural ideas, but production files should match the supplier’s board thickness, crease rules, glue flap widths, folding sequence, and die-cutting equipment.
How Do You Get the Right Dieline Template?
Before asking for a dieline template, gather the details a supplier will need to build the package correctly:
- Identify the package style, such as a folding carton, mailer box, sleeve, pouch, label, or rigid box.
- Measure the product and add clearance for inserts, cushioning, folding, filling, or product movement.
- Choose the substrate, board thickness, flute grade, or film type before requesting the template.
- Request a supplier template matched to the printer’s equipment, standard dies, substrate options, and finishing capabilities.
- Confirm the required bleed, safe zones, line colors, stroke weights, glue areas, and non-printing layers.
- Test the dieline with a printed mockup to check fit, folding, panel alignment, barcode placement, and label space.
- Approve the editable working file and the supplier’s preferred print-ready export, such as AI, PDF/X, layered PDF, EPS, CAD, or packaged artwork files.
What are the Advantages and Disadvantages of Using Dielines?
Dielines improve production accuracy and efficiency but introduce upfront complexity and can increase tooling costs.
The advantages of using dielines include the following:
- Minimizes miscuts and misfolds, reducing scrap and rework.
- Standardizes instructions for printers, die cutters, and assembly teams.
- Protects brand elements by keeping logos and text within safe zones during trimming and folding.
- Supports mass production by providing consistent die geometry.
The disadvantages of using dielines include:
- Challenges novices due to the technical complexity of creating accurate dielines.
- Increases capital expense for custom dies on complex shapes.
- Adds unnecessary overhead for simple designs that don’t require die-cutting.
- Depends on supplier specifications, risking incompatibility if independent dielines are created without confirmation.
Dieline Mistakes Causing the Highest Production Costs
The expensive errors usually happen before the press runs: a panel is measured from the wrong edge, the glue flap is too narrow, the barcode sits inside a fold, or the bleed stops at the trim line. These mistakes can force a new die, delay production, waste printed sheets, or make the package hard to assemble. Catch them in a full-size paper prototype, white sample, or supplier proof before approving tooling. Check product clearance, flap locking, glue overlap, barcode placement, panel orientation, bleed, and whether folded panels hide or distort important artwork. For corrugated or rigid packaging, confirm the board thickness with the supplier because material caliper can change fold allowances, inside dimensions, and product fit.
Major Applications of Dielines Across Various Industries
Across industries, dielines change according to the product’s size, handling needs, display format, safety requirements, and shipping environment. A food carton, electronics insert, cosmetics sleeve, and e-commerce mailer may all use the same basic cut-and-fold logic, but each one needs different clearances, label areas, closures, and reinforcement points.
- Food Packaging: Food dielines usually reserve space for nutrition panels, ingredient lists, resealable features, ventilation holes, tamper-evident sections, and barrier-layer requirements while keeping the product protected and easy to fill.
- Beverage Packaging: Beverage carriers and sleeves often need reinforced handles, stacking support, glue pattern control, ventilation, and panel layouts that can hold multiple cans, bottles, or cartons without tearing during transport.
- Electronics Packaging: For electronics, the dieline may include foam inserts, cable compartments, ESD-safe liners, barcode panels, and staged folds that protect small parts, connectors, screens, or accessories during shipping.
- Pharmaceutical Packaging: Pharmaceutical dielines need accurate label panels, lot-code areas, expiration-date placement, tamper-evident features, and space for child-resistant or safety-related structures where required.
- Cosmetics and Beauty Products: Cosmetics packaging often uses dielines for window cutouts, insert cavities, foil-stamp areas, batch-code panels, label wraps, and tight carton tolerances for bottles, jars, tubes, and compacts.
- Luxury and Gift Packaging: Luxury dielines focus on wrap allowances, lid-and-base clearance, magnetic closure placement, ribbon slots, insert depth, foil-stamp positioning, and finish-sensitive surfaces.
- Stationery and Publishing: Stationery dielines are shaped around spine folds, pocket depth, tab positions, gussets, corner radii, and score placement for folders, sleeves, book covers, notebooks, and presentation kits.
- Subscription and E-Commerce Boxes: E-commerce dielines often include mailer locking tabs, dust flaps, tear strips, return-flap areas, insert slots, shipping-label panels, and crush-resistant fold geometry for parcel handling.
- Toys and Games Packaging: Toy and game packaging may require window cutouts, hanging tabs, blister-card areas, tray inserts, locking flaps, safety-label panels, and retail display features for puzzles, board games, figures, and toy sets.
How to Read a Dieline Quickly?
To read a dieline effectively, recognize the purpose of each line and layer. Interpret solid lines as cuts for panels and edges, dashed lines as folds or score lines, and dotted lines as glue areas or overlaps. Understand color coding to distinguish layers such as design areas, flaps, or edges. Follow registration marks for alignment during press setup and die cutting, and finally verify layer names and the file’s color legend before production to ensure accuracy.
Current Digital Workflow Considerations for Dieline Design
Many packaging teams now use CAD-based dieline generation, 3D visualization, and structured file metadata to reduce manual handoffs and catch design issues earlier. These tools can help designers preview the package form, check proportions, review artwork placement, and identify fit problems before ordering a prototype. The workflow still depends on the supplier’s supported formats, machine capabilities, substrate limits, and production requirements, so every digital dieline should be verified with the printer or packaging manufacturer before approval.
Print-Ready Dieline Standards
Print-ready dielines follow the supplier’s production requirements so the structure and artwork stay aligned during die making, printing, cutting, and assembly. Most print-ready files keep mechanical paths as vector lines on separate non-printing layers. Mechanical paths are the technical lines that tell the printer or die maker where to cut, fold, score, perforate, or glue the package.
Color mode, spot colors, image resolution, bleed, safe zones, registration marks, and export settings should follow the printer’s specifications. CMYK, 300 dpi images at final size, PDF/X export, and 0.125 to 0.25 inches of bleed are common starting points in many workflows, but they aren’t universal requirements. Confirm the final file format, substrate, line colors, stroke weights, finish layers, and production notes with the supplier before proofing, tooling, or mass production.
Before production, DnPackaging or the printer should verify:
- The dieline matches the approved product dimensions and package structure.
- Cut, fold, score, perforate, glue, and overlap lines; use the supplier’s required colors, stroke weights, and layer names.
- Bleed and safe-zone measurements match the printer’s production tolerance.
- Barcodes, QR codes, warnings, and legal text sit away from folds, seams, glue areas, and trim edges.
- Artwork, images, fonts, color mode, spot colors, and finish layers follow the supplier’s prepress requirements.
- The substrate, board thickness, coating, laminate, and finishing method match the approved quote and sample.
- The exported file format matches the printer’s requirements, such as AI, PDF/X, layered PDF, EPS, DXF, CAD, or packaged artwork files.
- A physical or digital proof has been approved before tooling, printing, or mass production.
Compliance note: Dielines can reserve space for required labels, tamper-evident features, lot codes, and child-resistant structures, but they don’t guarantee regulatory compliance. Food, pharmaceutical, child-resistant, or medical packaging should be reviewed against current FDA, CPSC, state, and supplier-specific requirements before production.